
When I first stepped into wildlife photography, I quickly learned that the right settings matter more than the camera itself. Animals move quickly, light often changes without warning, and I usually get only one chance to press the shutter. So in this guide, I’ll walk you through the exact settings I use for wildlife and explain why they work, especially if you’re still learning or upgrading your skills.
Who This Guide Is For
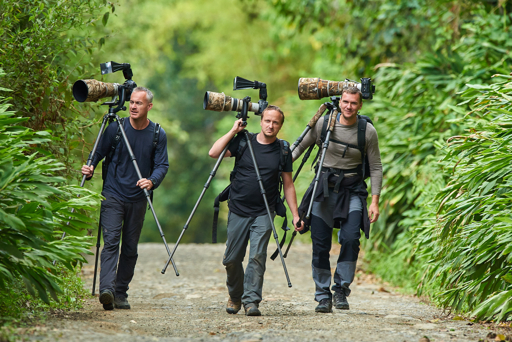
This guide is for beginners and enthusiasts using DSLR or mirrorless cameras who want sharper, more consistent wildlife photos in real‑world conditions. It focuses on practical, field‑tested camera settings that you can apply immediately for birds, mammals, and other wildlife. Before diving into settings, though, it’s worth noting that your results also depend on the body you’re shooting with choosing the best wildlife camera for your skill level ensures these settings actually perform the way they’re designed to.
Why Wildlife Camera Settings Matter
Wildlife subjects move quickly, unpredictably, and often in difficult light, which makes correct camera settings critical for sharp results. You rarely get a second chance, so your setup must prioritize fast shutter speeds, accurate autofocus, and flexible exposure control.
The Essential Camera Settings
Shutter Speed
- Use at least 1/250 sec for general wildlife to avoid motion blur.
- For fast action (running animals, birds in flight), aim for 1/1000–1/2000 sec or faster.
- Longer focal lengths magnify camera shake, so increase shutter speed as your lens gets longer.
Aperture
- Use wide apertures (around f/2.8–f/5.6) for strong subject isolation and blurred backgrounds.
- Stop down to around f/8–f/11 when you want more depth of field on large animals or groups.
ISO
- On entry‑level cameras, try to stay between ISO 100–800 for best image quality, and increase only when needed.
- Modern full‑frame cameras can handle ISO 1600–3200 (or higher) while still giving usable results.
Quick‑Start Settings
If you are unsure where to begin, use these as your baseline settings and adjust from there.
- Mode: Aperture Priority (A/Av)
- Aperture: f/5.6
- Shutter Speed: keep above 1/1000 sec for movement (raise ISO if it drops lower).
- ISO: Auto ISO, range 100–3200
- Focus Mode: Continuous AF (AF‑C / AI Servo)
- Focus Area: Single point or small zone on the animal’s eye
- Drive Mode: Continuous high‑speed burst
Recommended Settings for Common Wildlife Scenarios
Use these ready‑made settings as starting points and fine‑tune based on your light and camera.
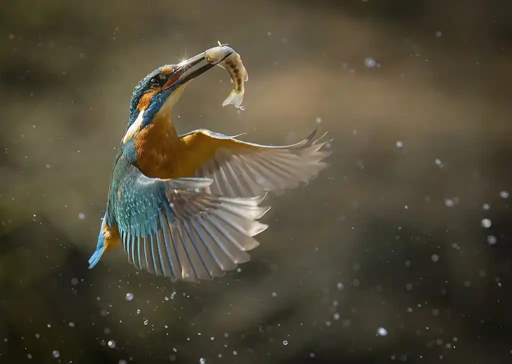
Birds in Flight
- Shutter Speed: 1/2000–1/3200 sec
- Aperture: f/5.6–f/8
- ISO: 400–1600, or Auto ISO with an upper limit around 3200
- Focus Mode: AF‑C / AI Servo
- Focus Area: Wide area or small zone, animal/bird eye‑AF if available
- Drive Mode: High‑speed continuous burst
Running Mammals
- Shutter Speed: 1/1000–1/2000 sec
- Aperture: f/4–f/8
- ISO: 200–1600 (auto if light changes quickly)
- Focus Mode: AF‑C / AI Servo
- Focus Area: Single point or small zone on the head/eye
- Drive Mode: High‑speed continuous burst
Perched Birds or Resting Animals
- Shutter Speed: 1/400–1/500 sec
- Aperture: f/5.6–f/11 depending on how much of the animal you want sharp
- ISO: 100–400 in good light
- Focus Mode: AF‑S / One Shot
- Focus Area: Single point directly on the eye
Low‑Light Wildlife (Dawn, Dusk, Forest)
- Shutter Speed: 1/250–1/500 sec
- Aperture: as wide as possible (f/2.8–f/4 if your lens allows)
- ISO: 800–3200, or higher on modern sensors
- Focus Mode: AF‑C for moving subjects, AF‑S for static subjects
- Extra Tip: Use burst mode to improve your chances of a sharp frame.
Best Shooting Modes for Wildlife

Aperture Priority (A/Av)
- Ideal for beginners: you choose aperture and ISO, the camera sets shutter speed.
- Set aperture around f/5.6 and watch that shutter speed stays fast enough; increase ISO if it drops too low.
Manual Mode with Auto ISO
- Great for experienced users: you lock shutter speed and aperture, and let the camera adjust ISO.
- Example: set 1/1000 sec and f/5.6, then let Auto ISO float to maintain correct exposure as light changes.
Why to Avoid Full Auto
- In full Auto, the camera may choose slow shutter speeds or narrow apertures that cause motion blur or messy backgrounds.
- Using at least Aperture Priority gives you much better control over sharpness and subject isolation.
RAW vs JPEG: Get the Most from Your Files
- Shoot in RAW instead of JPEG to retain maximum detail, color, and dynamic range.
- RAW files make it easier to recover shadows and highlights, correct white balance, and control noise in post‑processing.
Using Exposure Compensation and Histogram
Exposure Compensation
- Use the +/- exposure compensation control to quickly brighten or darken your image without changing mode.
- Dark subject against bright sky: dial in +1 to +2 stops so the animal is not a silhouette.
- Bright subject (like a white bird) in strong sun: dial in around ‑0.3 to ‑1 stop to protect highlights.
Histogram Basics
- Check the histogram to avoid clipping highlights or shadows, especially in high‑contrast scenes.
- Aim for a histogram that is not stacked hard against either edge unless you are intentionally creating a silhouette or high‑key image.
Autofocus Settings for Wildlife
AF‑C / AI Servo vs AF‑S / One Shot
- Use AF‑C / AI Servo for moving wildlife such as birds in flight or running mammals.
- Use AF‑S / One Shot for perched birds or slow‑moving animals where you have time to recompose.
Focus Area and AF Points
- Use single point or a small group of focus points to avoid focusing on branches, grass, or the background.
- Use wider or tracking AF areas for fast, erratic subjects like birds in flight.
Eye‑AF and Animal Detection
- If your camera has animal or bird eye‑AF, enable it to keep focus locked on the eye.
- Be aware it can struggle when the eye is hidden, very small in the frame, or in low contrast conditions, so be ready to switch to a smaller AF area.
Back‑Button Focus (Advanced Tip)
- Assign AF to a rear button so you can separate focusing from the shutter release.
- This makes it easier to track moving subjects and then recompose without refocusing every time.
Drive Mode and Burst Rate
- Set your camera to high‑speed continuous burst to capture fast sequences of movement.
- Shooting short bursts increases the chance of getting one perfectly sharp frame with ideal wing or leg position.
White Balance for Natural and Creative Color
- If you shoot RAW, Auto White Balance is usually fine and can be adjusted later.
- For warmer, more pleasing wildlife images at sunrise or sunset, use the “Cloudy” preset or a Kelvin value around 6000–7000 K.
Gear Tips That Affect Your Settings
Focal Length and Shutter Speed
- As a simple rule of thumb, use a shutter speed at least equal to 1 / focal length (e.g., 400 mm → 1/400 sec) when hand‑holding.
- With image stabilization and good technique, you can sometimes go slower, but always prioritize enough speed for subject movement.
Image Stabilization (IS / VR / IBIS)
- Stabilization helps reduce camera shake, especially with long telephoto lenses.
- It does not freeze subject movement, so you still need fast shutter speeds when animals are moving.
Tripods and Monopods
- Use a tripod or monopod with heavy telephoto lenses to reduce fatigue and camera shake, especially when waiting long periods.
- Supports are particularly useful in low light where you need slower shutter speeds for static subjects.
Understanding Animal Behavior and Timing
- Learn your subject’s behavior so you can anticipate movement and pre‑set your shutter speed and AF mode.
- Visit the same locations repeatedly; many animals follow daily routines and prefer specific perches or feeding spots.
Working with Natural Light
- Early morning and late afternoon (golden hour) provide softer light, better colors, and easier exposures.
- In harsh midday light, expose to protect highlights, then lift shadows later when processing your RAW files.
1. Start With Shutter Priority for Moving Subjects
When I’m photographing animals in motion—birds flying, deer running, or even fast-moving insects—I switch to Shutter Priority (S/Tv mode). It lets me lock in the shutter speed I need, while the camera handles exposure balance.
The shutter speeds I typically set:
- 1/2000 sec for birds in flight
- 1/1000 sec for running mammals
- 1/500 sec for slow movement or perched birds
Q: Why not just use Auto mode?
A: Auto rarely chooses a fast enough shutter speed for sharp wildlife shots. Shutter Priority gives me the motion control I need without overwhelming beginners.
2. Use Continuous Autofocus to Track Wildlife
Wildlife rarely stands still. I rely heavily on Continuous AF (AF-C / AI Servo) to keep the subject sharp as it moves toward or away from me. I also set focus area to a small tracking zone, not the whole frame, so the camera doesn’t jump to branches or background leaves.
Q: Which autofocus mode works best for unpredictable animals?
A: Continuous AF paired with a small tracking zone. It reacts faster and reduces focus hunting, especially with birds and fast mammals.
3. Choose the Right Aperture for Background Separation
I usually shoot wildlife with a wide aperture. It isolates the subject and softens the background. This makes animals “pop,” even in messy forest environments.
My usual aperture choices:
- f/4 – f/5.6 for large mammals
- f/5.6 – f/6.3 for birds at long focal lengths
- f/2.8 only when light is extremely low
Q: Should beginners use the widest aperture available?
A: Not always. If the depth of field becomes too shallow, the animal’s eye may be sharp, but the rest blurs. I keep a balance so the entire head stays in focus.
4. Set ISO Based on Light, Not Guesswork
Wildlife often appears at sunrise or inside shaded forests. I let ISO float higher because sharpness matters more than noise. I usually set Auto ISO but limit the max value depending on my camera’s capability.
My practical ISO limits:
- Max ISO 3200 on entry-level models
- Max ISO 6400 on advanced cameras
Q: Doesn’t Auto ISO increase noise?
A: It can, but missing the shot due to motion blur is worse. A slightly noisy image is still usable; a blurry one isn’t.
5. Shoot in High-Speed Burst Mode
Wildlife behavior can change in a split second. I always switch to high-speed continuous shooting.
Why it matters:
- Catching wing positions in flight
- Capturing hunting or feeding moments
- Recording interactions between animals
Q: How many frames per second do I actually need?
A: At least 8 fps. Anything faster gives you a smoother sequence, especially with birds.
6. Set Exposure Compensation for Light Changes
Backlit animals, snowy scenes, and dark forests confuse the camera’s metering. I manually adjust Exposure Compensation to keep the animal properly lit.
My go-to adjustments:
- +0.3 to +1 for dark animals in bright scenes
- −0.3 to −1 for white animals or bright backgrounds
Q: Why not fix everything in editing later?
A: If exposure is incorrect at capture, highlights on feathers or fur may be permanently lost. Exposure Compensation prevents this.
7. Use Manual Mode Only When You Understand Light
When I know the light won’t change quickly—like at golden hour—I switch to Manual Mode. This gives me consistent exposure across the entire sequence.
My manual setup:
- Fixed shutter speed for action
- Fixed aperture for depth control
- ISO manually adjusted if light shifts slowly
Q: Should beginners start with Manual Mode?
A: Not at first. It slows you down. Learn Shutter Priority and Continuous AF first; manual control becomes easier later.
8. Pick RAW Format for Wildlife Editing
I always shoot in RAW because wildlife scenes often require recovering shadows, reducing noise, or adjusting color. JPEG limits the flexibility of editing.
Q: Is RAW too complicated for a beginner?
A: Not really. Even basic apps handle RAW now. The benefit you gain in detail and correction is worth it from day one.
9. Dial in the Right White Balance
Fast-changing light—like early morning shade or sunset glow—can shift color quickly. I prefer setting Daylight or Cloudy instead of Auto so my images stay consistent.
Q: Why avoid Auto White Balance?
A: AWB often cancels warm or cool tones that make wildlife photos look natural. A fixed mode keeps the color mood you see in real life.
10. Stabilization for Handheld Shooting
Long lenses amplify hand shake. When I shoot handheld, I activate lens stabilization. When I’m on a tripod, I switch it off to avoid stabilization vibration.
Q: When should I turn stabilization off?
A: Turn it off on a tripod or monopod. Stabilizers try to correct motion that doesn’t exist and can blur the image.
Final Thoughts
Wildlife photography isn’t about memorizing textbook settings it’s about reacting quickly and using settings that support your style. Once you learn how shutter speed, focus behavior, ISO, and aperture work together, the field becomes more enjoyable and your keeper rate improves dramatically. I still refine my settings every time I go out, but these core adjustments guide most of my wildlife shoots.